- You are here:
- Home »
- Blog »
- Manage Your Computer Business »
- The Cheapest Laptop Screw Management System – That Works Great!
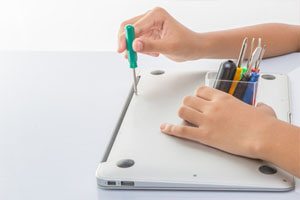
The Cheapest Laptop Screw Management System – That Works Great!
One of our Technibble forum members shared with us a fantastic way to organize screws when disassembling a laptop. The need to organize laptop screws comes from the fact that there are many screws with many different sizes and lengths depending on which part it came from. Getting the laptop apart isnt the problem, but knowing which type of screw went where when putting it back together is. Its incredibly frustrating to have left over screws when you put the laptop back together again and then trying to figure out where it came from.
This is one Technibble members solution to the problem.
Aaron from Aarons PC Support said:
I have tried different screw management techniques and nothing has been as cheap, fast, and perfect as this. I have never had extra screws or mix-ups during re-assembly. In this example this HP laptop has a broken DC power jack which will require the laptop to be taken apart completely.
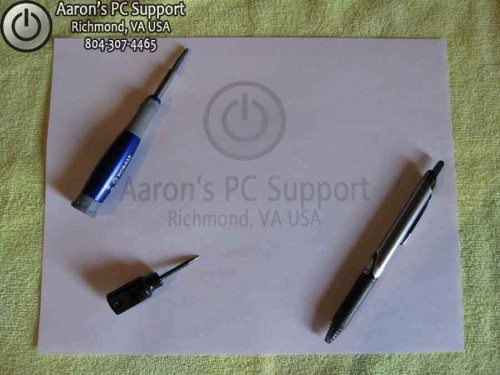
First, you will need a plain sheet of 8.5 x 11 paper, a towel (microfiber prefered, or other soft top as not to scratch laptop lid), a pen, screwdriver, and a small Awe.
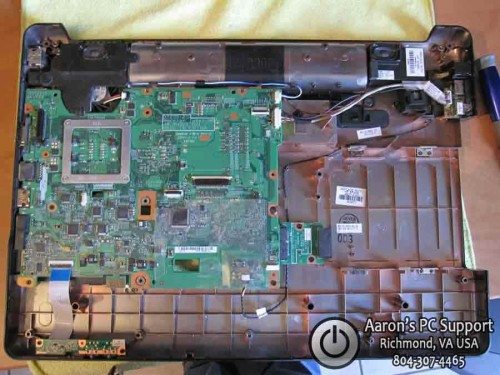
Next, we need to remove all of the covers and hardware from the bottom of the laptop. This will expose all screws that may be hidden. Be sure to place all of your parts into or on an anti-static bag of some sort.
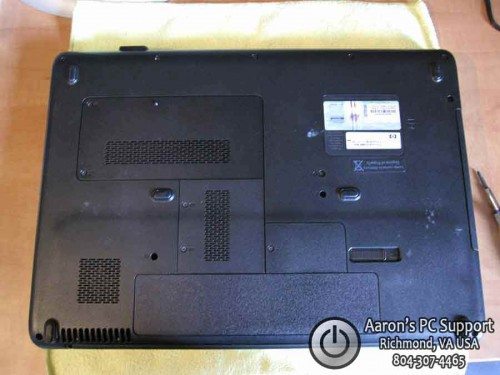
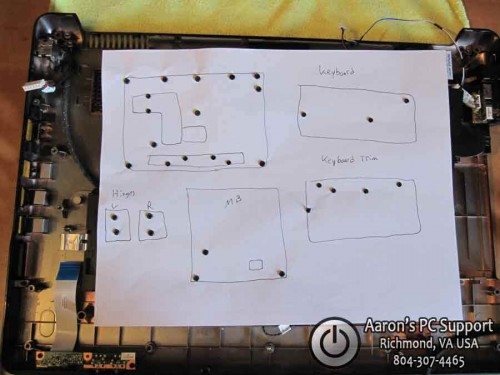
Now we can see all of the screws that need to be removed. Start by taking your blank piece of paper and drawing a rough outline of the bottom of the laptop. I like to draw basic features such as the battery bay, cover locations, as to give a orientation reference as we move along.
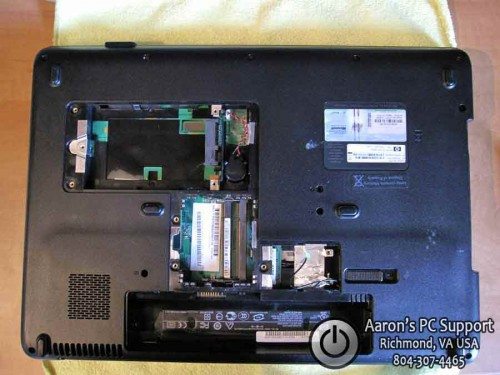
Now punch holes into the paper where you have screws drawn. It is important to punch the holes with an Awe or something similar. Not punching a small hole, and then inserting the screw will rip the paper, and the paper will not hold the screws tightly.. which means you will probably lose one. To make punching real easy: place the rough outline paper on a towel, then punch. We don’t need any bloody fingers.
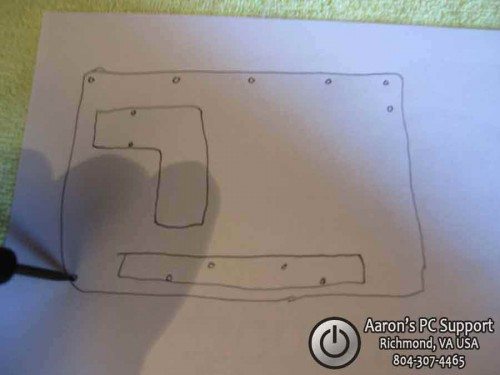
Next, remove all of the screws and punch them into the oppropriate spots on the paper.
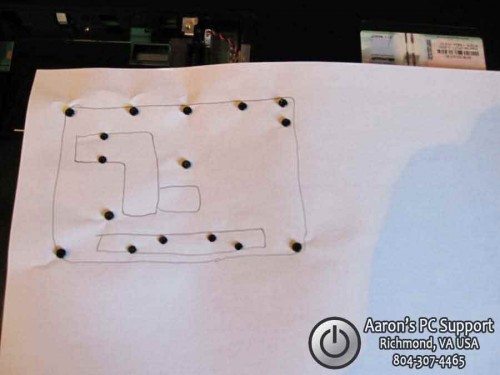
Here, you can see the paper is upside down, and all of the screws are held securely in place.
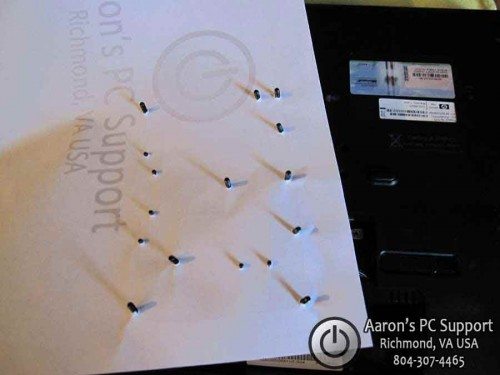
Now we flip the laptop over, right-side-up, and remove the keyboard and keyboard trim ring to reveal some more screws. So I draw another simple sketch and punch some more holes. I also punch holes for the LCD hinge screws as well.
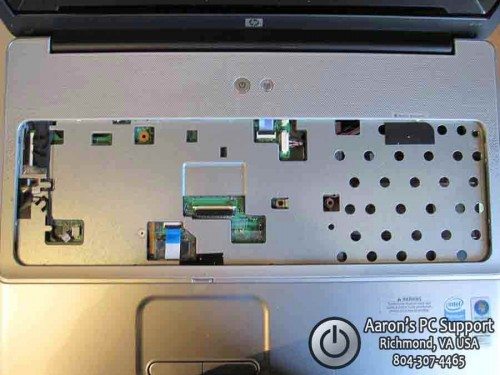
Now we can remove the top cover of the laptop to reveal the motherboard and some more cabling. Now is a good time to draw a diagram of the motherboard, punch, and remove and place the screws in the paper.
Now it is easy to reassemble the laptop and place the screws into the correct positions… another job well done!
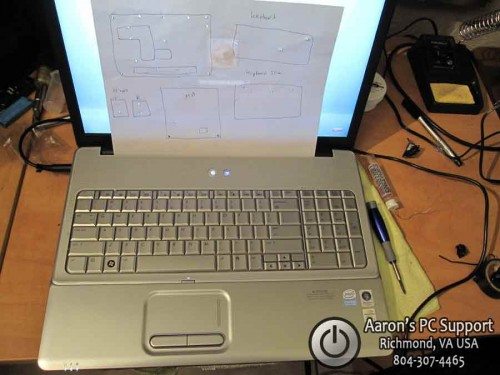
I hope this helps some of you out there using pill bottles and other methods that “lump” together a bunch of screws that may be slightly longer/shorter or fat/skinny. If your repairs didn’t go as planned, you still have your paper so you can disassemble the laptop again if needed.
Special thanks to Aaron of Aaron’s PC Support for sending this in. Aaron’s PC Support is an affordable computer repair shop with over 20 years of experience. Aaron’s PC Support provides alternative low-cost computer repair services for Central Virginia; Richmond VA, Chesterfield VA, Midlothian VA, Chester VA, and Henrico VA.
If you want to learn how to repair laptops including how to disassemble them, check out Podnutz’s Laptop Repair Videos.
Session expired
Please log in again. The login page will open in a new tab. After logging in you can close it and return to this page.

I use medicine holders that have a slot for each day of the week. Interesting idea using the diagrams drawn on paper. Thanks for sharing.
This is by far the best way, simple but good. Thanks I’ll put it to use.
Great Idea. I have been trying to figure out a better system. I repaired a laptop last week and had 5 screws left. So i will definietly try this one. thanks
In some cases if you can find the manufacturer’s teardown instructions, it includes a screw map that can be printed out.
Great article!
I stand in awe over the clever use of the awl…
Cheers!
I do something similar, but have always used double stick tape. I stick the head of the screw to the paper, I like this better though!
I use small fishing tackle boxes with compartments and label the inside of the lids such as base screws, lcd screws, top plastics and so on and when awaiting parts I store the disassembled laptops in the LCD boxes you get when you order them, I used to use little money bags and pop the screws in there and that used to drive me nuts.
Great tip though, never thought of that I might even try it out.
Super idea! Thanks Aaron and Bryce
Awesome tip. beats fighting tape.
Great tip, I’ve heard of and tried many ways to keep track of laptop screws but this is the best.
Mr Whitty, wonderful article, great tips.
One note: the small punch tool; that you make holes in the paper with may be “awesome” if you are into “Valley Girl” language, but the tool is still an awl, not an awe.
How exceedingly intelligent! GREAT idea!
Good call! You could possibly use the screwdriver instead of an awl.
I use a piece of corrugated cardboard, starting off with a trace of the laptop itself. Then I usually just push the screws into it or use the screwdriver to punch a starter hole. As I get further into the laptop I draw the other areas as I go, respective to the outline of the laptop. Works great! When it occurred to me to organize the screws this way, I thought to myself, “This makes so much sense, this must be how everyone does it!”
Good suggestion on fastener management.
(Used it for years in automotive and motorcycle repair, using cardboard.)
An alternative to drawing a picture is to use your digital camera and print out the picture, then insert the screws in the appropriate place.
Cheers!
That is so simple its brilliant, nice. Two thumbs up. :)
Nice one! I take pictures before, and put screws in diferent small containers. But this seems to work also.
Great tip. Why can’t you show us more practical tips on your weekly “Technible” as you used to do. Looking forward to more tips like this.
Thanks .
Tom.
Very ingenious, thanks!
I wanted to mention that you should put your components IN an antistatic bag, but not ON an antistatic bag. I’m no “bag expert”, but this question pops up on A+ exams all the time… and the correct answer is “IN but never ON the bag”.
Great tip, thanks Aaron and Technibble!
Genius. Pure genius.
This will come in handy with all the StinkPads I work on
that’s a great way to remeber where the screw should be.
This is the way i use in my workshop to maintain laptop screws. But u did a nice job to share it with others man. Great work
That is a fantastic idea. I am definitely going to try this on my next tear down. I don’t have an awl handy so I’ll improvise with a straightened paper clip. Thank you Aaron for the tip. And, thank you Bryce for posting it.
I find the quickest and IMO the best method is a 7 day pill box – My workshop looks like a pharmacy but they are great for organising screws… on each ticket sheet I write down which day is what screw i.e.
S – bottom base (I always abbreviate i,.e. base)
M – Keyboard (KB)
T – under KB
W – Hinges
T – FAN/CPU
F – MB
then I know which order to re-assemble again – just work from the bottom up! Especially useful if you order parts and come back to it a week later or if someone else needs to put it back together again. Also very useful if you want to put laptop into storage while waiting for parts as you wont lose screws because the pill pots all have lids.
good idea, we used to tear down laptops at our shop. I used a box and sort of organized them.
But laptops are like VCR’s they have a lot of screws and if you put the wrong screw in the wrong place you can really mess things up, I found that out when working on VCR’s.
Brilliant! I completely dumped my old method today and started using this. So simple and screws will never get mixed up even if it’s dropped.
If I knew this was going to be such a big hit, I would have shared it earlier! I’m glad it seems to be working for a vast majority!
Sincerely,
Aaron H.
this is the best ,beats my ice tray for laptop screw management heheheheh nice post
Heylo, Just used this method last night, it worked flawlessly. I used an paperclip like a poster above stated, and at first, it was hard because i kept tearing the paper…but eventually i got the hang of it
Thanks again
Super idea,