Laptop Screw Symbol Tricks

with whatever i disassemble, car parts, printers, computers, etc... I've just used the same method my dad taught me.
assembly is usually the reverse of disassembly (thanks Haynes Manuals)
1st screws I remove get placed furthest away
then as each assembly is taken out the screws go near it. till I have the last thing or screw removed closest to me.

i use a rag or static mat to keep the screws on so they don't move around. but sometimes there's an "incident" and i'm using a magnet to find them on the floor.
 
I use a piece of double sided sticky tape for each section of screws and label the piece with a black marker, then use another piece of tape etc etc.

I know this sounds funny but over the years it seems to work best for me.
I also take 1 or 2 pictures if I need to for reference during reassembly.
This has reduced the number of "spare sparts" I may end up with after a job :)
 
I posted this in another thread with the same question, but I might as well add it here too, in case someone comes looking for it and doesn't see the other thread.

--

My favorite method, which takes a bit of setup time, is a great way to keep screws organized and in place.

If you take some duct tape or masking tape, (or as Corbin noted above, doube-sided tape,) connect them together to be about the size of a piece of paper, and place it on the table next to your computer (sticky side UP) you can place the screws, head down, so they stick nicely to the tape (and are easier to pick up.) You can then use a permanent marker to circle the screw groups and label them to where they go on the PC, for example, "under battery" or "left side of case".

You can also use a small piece of tape in each corner to keep the whole piece in place, just in case you accidentally touch it and it sticks to you or something. lol.

Hopefully this made sense and helped. It does wonders for me when I have a complicated build (laptops, game systems, etc.) ahead of me.
 
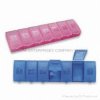
I have a bunch of pill boxes and use one for each machine. base screws first compartment, bezel screws second, mobo third, etc.

If the machine has to sit for a few days I close the lids and put customer's name on a sticky label then just pull it out and put them back in reverse order.
 

Attachments

  • images.jpg
    images.jpg
    4.6 KB · Views: 145
It does help during reassembly quite a bit. Now if we could get a better way to keep track of the 12 billion screws on the rest of the laptop during a tear down lol.

I use screw trays. I use a metallic marker and put 2 lines down the tray to separate it into 3 sections and mark them bottom, motherboard and top. The outside holes of the bottom section are reserved for screws on the side. I make the top section smaller since there are usually only a few screws for the LCD hinges, keyboard etc.

Then I can put the trays on a shelf if I'm waiting for parts, and not have to worry. I used to use sheets of magnet (the same stuff you get for car door signs etc.) but I find this much better now that I'm dealing with multiple laptops at the same time since these stack nicely.

sku_26180_2.jpg


you can buy them here: http://www.dealextreme.com/search.dx/search.screw%20tray
 
Last edited:
I use some little tubs that screw on top of each other. They originally had nails in. I use a tub for each level. Will try to get some pics later.
 
BUMP! Does anybody have any other insights to offer? I'm currently liking the pill-box labeled method
 
Hey Vicenarian,

Like one other mentioned on here..

I use only a single 8.5x11 sheet of paper.

Draw a rough outline of the bottom of the laptop on half the paper. Draw circles to indicate screw locations. I then use a small awe (or paperclip) to poke a small hole on each screw circle. Remove screws and push into paper. The resistance of the paper (When pre-making the holes) holds the screws in place. No tape or other materials needed. I do this for each section.. Bottom of laptop, keyboard screws, under keyboard screws, hinges, and then finally internal MB screws. Each time I draw a rough outline of the "workspace" the screws came out of. This takes virtually no time at all, and I have never lost a screw.

TIP: when repairing laptops I place down a microfiber towel as used for car detailing. Any towel will work, but after you make your circles marking the screw locations, place the paper on the towel and then punch your holes with the awe. I can punch 20-30 screw holes in 10-15 seconds. I was doing it by hand, holding the paper in mid-air and punching the holes, but kept stabbing myself... until I had the brilliant idea of using the towel as a punch base :) .. silly me.

This is BY FAR the best way to do it. It can be very important to have all your screw locations to be the the same. The aspire one is a good example. The right corner screw is 3-4x longer than the left corner screw because of the VGA cable location.

I have been using this method for a very long time with bolts from cars. For that though, I use cardboard.

Sincerely,
 
laptop screws

You will notice that many manufacturers use the same size of screws/colors. For instance, the screws under the battery are almost always flat and small. The motherboard screws are usually longer with some paint on them/orange usually!.

If I remove hardware that has screws (HDD, Fans,etc.) I usually screw it back to the hardware so that I know it belongs to it.

You will eventually get this, it took me a while to find out a pattern to screws, however using my method along with other methods described in this thread will let you know what works for YOU!

-God Bless
 
Back
Top