Appletax
Well-Known Member
- Reaction score
- 385
- Location
- Northern Michigan
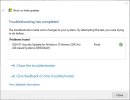
Edit: an alternative is a program made by Microsoft that can be used to hide the update. Much faster and easier.
wushowhide

---
<Let me know if all this info is accurate/proper, if it should be edited>
This procedure allows a security update from January 2024 for Win 10 to install successfully.
The way I do it is by using GParted in a Linux Mint Live USB - works great and is FREE.
GParted > right click the main partition (might be named 'basic data partition') which contains the majority of all the data on the drive
> Resize/Move > on laptop I recently worked on, the WinRE Recovery Partition is 522.00MB. I want to increase it to 800MB so there's plenty of space available for future updates.
> New Size (MiB) > Reduce by 276.00MB (I tried 278 and the final size of the recovery partition was 802 MB lol) > Free space following (MiB): 276 > Resize/Move at bottom right corner
> Now there's unallocated space between the main partition and the recovery partition > right click the recovery partition (should be the last partition) > change 'Free space preceding (MiB) to 0 > increase the New size to the maximum, which was 800MB in my case
> 'Free space following (MiB) should changed to 0 Mb> Click Resize/Move at the bottom right corner
> You will get a message saying, "moving a partition might cause your operating system to fail to boot - click OK and don't worry about it.
> Click the green check mark towards the top left, which will "Apply All Operations." I did this and got the message, "All operations successfully completed."
> Restart the computer.
> The computer will perform a very brief check disk.
> Windows will have a notification telling you that you need to check the disk for errors. Delete this.
> Now you can install Windows Update 2024-01 Security Update for Windows 10 Version 22H2 for x64-based Systems (KB5034441).
> Tune-up the PC with DISM repair, System File Checker Repair, and Check Disk (the full version of it), delete temp files (Settings > Storage > Temporary Files), run Glary Utilities cleaner and Registry repair.
Commands used in Command Prompt or PowerShell (reboot after doing each process):
1: dism /online /cleanup-image /restorehealth
2: sfc /scannow
3: chkdsk /f /r C:
Oh, I think that using 278MB would increase the recovery partition by 2MB over the 800MB I wanted because of a super tiny unallocated space that is right below the recovery partition. After applying the operations in GParted, that tiny space goes away and is no longer shown.
Sooooo ridiculous that Microsoft has not fixed the issue with this update always failing unless you resize the recovery partition. It's been around 6 months now since it was released. That's Micro$oft for you, I guess. Lame lol.
wushowhide

---
<Let me know if all this info is accurate/proper, if it should be edited>
This procedure allows a security update from January 2024 for Win 10 to install successfully.
The way I do it is by using GParted in a Linux Mint Live USB - works great and is FREE.
GParted > right click the main partition (might be named 'basic data partition') which contains the majority of all the data on the drive
> Resize/Move > on laptop I recently worked on, the WinRE Recovery Partition is 522.00MB. I want to increase it to 800MB so there's plenty of space available for future updates.
> New Size (MiB) > Reduce by 276.00MB (I tried 278 and the final size of the recovery partition was 802 MB lol) > Free space following (MiB): 276 > Resize/Move at bottom right corner
> Now there's unallocated space between the main partition and the recovery partition > right click the recovery partition (should be the last partition) > change 'Free space preceding (MiB) to 0 > increase the New size to the maximum, which was 800MB in my case
> 'Free space following (MiB) should changed to 0 Mb> Click Resize/Move at the bottom right corner
> You will get a message saying, "moving a partition might cause your operating system to fail to boot - click OK and don't worry about it.
> Click the green check mark towards the top left, which will "Apply All Operations." I did this and got the message, "All operations successfully completed."
> Restart the computer.
> The computer will perform a very brief check disk.
> Windows will have a notification telling you that you need to check the disk for errors. Delete this.
> Now you can install Windows Update 2024-01 Security Update for Windows 10 Version 22H2 for x64-based Systems (KB5034441).
> Tune-up the PC with DISM repair, System File Checker Repair, and Check Disk (the full version of it), delete temp files (Settings > Storage > Temporary Files), run Glary Utilities cleaner and Registry repair.
Commands used in Command Prompt or PowerShell (reboot after doing each process):
1: dism /online /cleanup-image /restorehealth
2: sfc /scannow
3: chkdsk /f /r C:
Oh, I think that using 278MB would increase the recovery partition by 2MB over the 800MB I wanted because of a super tiny unallocated space that is right below the recovery partition. After applying the operations in GParted, that tiny space goes away and is no longer shown.
Sooooo ridiculous that Microsoft has not fixed the issue with this update always failing unless you resize the recovery partition. It's been around 6 months now since it was released. That's Micro$oft for you, I guess. Lame lol.
Last edited:

